Installing VirtualBox on Windows
Before VirtualBox virtualization can be used it is first necessary to install it on the host system. The method of installation differs depending on the operating system running on host. In this chapter of VirtualBox Essentials we will be focusing on performing the installation on the Microsoft Windows family of operating systems.
Downloading VirtualBox for Microsoft Windows
VirtualBox is supplied as a pre-built, ready to run package for most operating systems including a Microsoft Windows flavors. The installation package is supplied in the form of a Microsoft Installer (MSI) file.
To download the appropriate installation archive open a browser window and go to the VirtualBox downloads page. On this page click on the Binaries (all platforms). From the download page select the appropriate Windows version from Platforms drop down menu (at time of writing the available options are Windows AMD64 and Windows x86. Select a language if required, read and agree to the license terms and then click on Continue.
On the final download page click on the link to the VirtualBox installation file (typically named something along the line of VirtualBox-1.6.0-Win_x86.msi) to initiate the download and save the archive to a suitable location on a disk drive.
Installing VirtualBox on Microsoft Windows
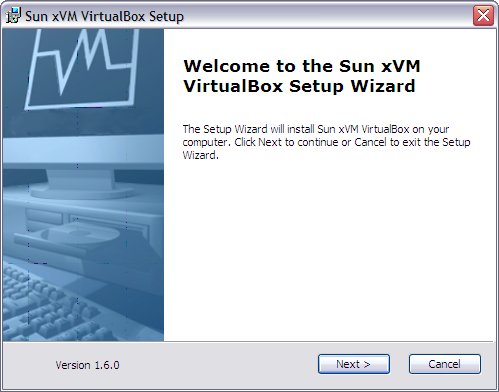
Once the VirtualBox installation archive has been downloaded the next step is to begin the installation process. This can most easily be achieved by locating the installation archive downloaded in the previous section in Windows Explorer and double clicking on it. Once launched, the initial installation window will appear as follows:
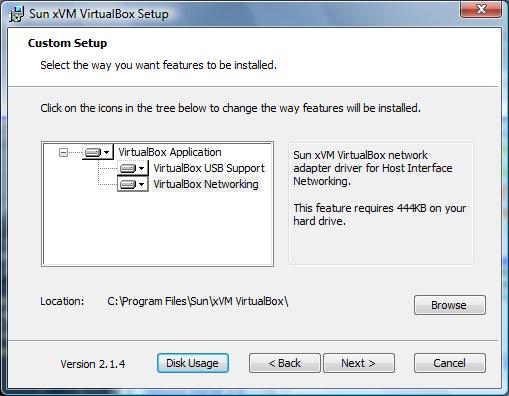
Click on the Next button to proceed to the licensing screen and read and accept the agreement. Click on Next to view the Custom Setup screen. By default VirtualBox installs both the VirtualBox application and two additional modules providing drivers for USB and Networking support. If you plan to use networking and USB devices within your VirtualBox virtual machines then it is wise to accept these defaults.
Change the default installation location if desired using the Browse button and click on Next and then Install to initiate the installation process.
During the installation process Windows may display some warning dialogs. These can sometimes appear iconized giving the false imnpression that the installation has locked up. If you encounter this problem check the Windows task bar for additional. These can sometimes appear iconized giving the false impression that the installation has locked up. If you encounter this problem check the Windows task bar for additional dialogs. Any such warnings can be ignored by pressing the Continue Anyway button.
Once the installation is complete click the Finish button to exit the installer.
Running VirtualBox on Windows
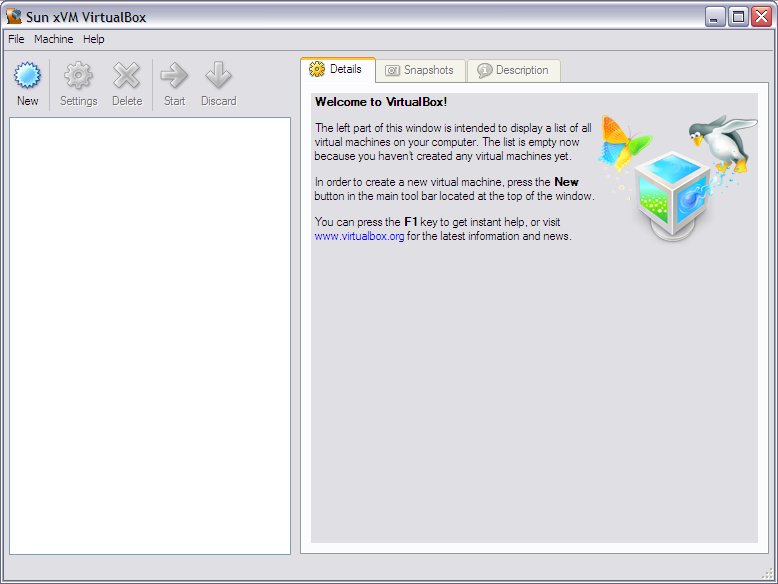
Once installation has completed VirtualBox will be listed in the Windows Start menu under the Sun xVM VirtualBox sub-menu. From this menu select VirtualBox to launch the application. The first time VirtualBox is run a registration dialog will be presented. This dialog needs to be completed and submitted before you can access the VirtualBox application. Once loaded, the VirtualBox main application window will appear as follows:
Uninstalling VirtualBox
VirtualBox may be uninstalled at any time using the standard Windows Add/Remove Programs applet.


